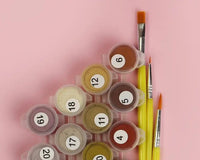
A paint by numbers kit gives you a roadmap: numbered zones and a color key. Follow it faithfully and you end up with exactly what the box promised.
That is satisfying the first few times. Eventually you start noticing the borders between colors. The transitions that feel too sharp. The sky that stops abruptly where the mountain begins.
What distinguishes a piece that reads as yours from one that looks like every other version of the same kit happens in the space between two adjacent colors. A single brushstroke, half dry, feathered across the line.
Layering is the choice to let one color breathe into another instead of stopping at the border like a coloring book. It is the smallest technique with the largest impact on how your finished canvas feels.
Start With a Kit You Are Comfortable Finishing
Pick the Right Difficulty Level
This is not the place to reach for the hardest canvas in your stash.
A beginner or intermediate kit gives you room to experiment. The stakes are low and the numbered areas are forgiving.
You can focus on technique without worrying about ruining something ambitious. If a blend goes wrong, the zone is small enough to paint over.
Advanced kits with tiny cells and dozens of colors are worth working up to. But learning to layer on one of those is like learning to drive in a snowstorm. Start on a calm road and build the muscle memory first.
Why Landscapes Work Best
Landscapes work especially well for blending practice.
The Four Seasons Tree kit has natural color transitions built into the design. Sky to foliage. Branch to sky. Trunk to ground. The gradients are already there in the composition, which makes layering feel intuitive rather than forced.

Scenery kits with open horizons give you long borders to practice on. Sunset gradients. Mountain silhouettes fading into mist.
These are exactly the kinds of edges where a dry brush makes the difference between a flat outline and atmospheric depth.
The Dry Brush Approach
What You Need
Pour a small amount of the lighter color onto your palette. Dip just the tip of a clean brush and wipe most of it off on a paper towel.
You want pigment, not liquid. If the brush leaves a wet streak when you test it on scrap paper, wipe again. The technique only works when the brush is nearly dry.
Step by Step
Lightly stroke across the border where your two colors meet. Work from the lighter side into the darker, not the other way around.
Dragging dark into light creates a visible smudge. Dragging light into dark creates a haze that reads as atmosphere.
The dry brush deposits a whisper of the light tone over the dark edge. One pass, maybe two. The gradient should look like it belongs there, not like someone tried to blur a line.
Stop while it still looks subtle. The instinct is always one stroke too many. Overworked blends lose the texture that makes them convincing. A slightly imperfect transition reads as natural. A perfectly uniform one reads as digital.
Let It Dry Before Judging
Wet acrylic looks darker than it will be in the morning. What seems too faint at night often looks right by daylight.
Give each layer time to settle before adding another. Patience at this step is the difference between a smooth atmospheric transition and a muddy overlap that you cannot undo.
If you are working in the evening, step away and check it the next day before touching anything.
When to Leave the Lines Alone
Hard Edges vs. Soft Transitions
Some areas of the canvas deserve hard edges. Crisp architectural details and sharp foreground objects. The focal point of a portrait. A clean horizon line in a seascape.
These read better left as the kit designed them. Blurring a hard edge that should be sharp only makes the painting look out of focus.
The places where layering shines are transitions: sky to horizon, water to shore, fur to shadow, petal to petal.
Anywhere two colors meet that should feel continuous rather than adjacent. A mountain at dusk does not have a sharp line where the ridge meets the sky. Neither should your canvas.
Try a Custom Kit for Full Control
If you want full control over the composition from the start, a custom paint by numbers kit lets you choose an image where the blends already make sense.
A photo with natural gradient, like a sunset or a misty landscape, gives you a canvas built for this kind of work. You are not fighting the design. You are enhancing what is already there.

Upload a photo where the light changes gradually across the frame. Golden hour shots. Foggy mornings. These are the images where layering looks the most natural because the source already has soft transitions.
What Changes When You Start Blending
The Personal Touch
The painting stops being a product you assembled and becomes a piece with your handwriting on it.
Someone who has seen the same kit before will notice yours is different. They might not know why.
The answer is in the soft edges and the colors that bleed into each other just enough to feel alive. That is the mark of a hand, not a production line.
Accessories That Help
This is also when accessories start to matter.
A wider flat brush for washes and large transitions. A palette with wells that keep colors from drying out between sessions.
A brush cleaner that actually gets the pigment out of the ferrule. Small upgrades that open up more control without costing much money.

None of this gear is required to start. But once you see what a dry brush can do, you will want tools that make the technique repeatable instead of lucky.
A Trade Worth Making
A kit with clean numbered blocks is satisfying to finish. A kit where the blocks dissolve into each other is satisfying to live with afterward.
Layering takes a little more time and a little more attention. You will pause more often. You will stare at a border and decide whether to cross it. Some edges you leave alone. Some you soften. Every choice is yours.
What you get in return is a painting that nobody else has, even if they bought the same box. That is worth the extra hour or two.
Where to Start
Try it on your next kit. Pick two adjacent colors where the border feels too sharp. Thin the lighter tone, wipe the brush nearly dry, and feather the edge.
One section. See how it feels. See how it looks in the morning.
The ones who stick with this technique are the ones who realize the kit is not a set of instructions. It is a starting point. The painting begins where the numbers end.